 |
Over the last few weekends, i upgraded my DDE’s from old school light boxes to new CCFL halos from AACStyle.com. Follow the jump for the whole story and a whole bunch more pics! |
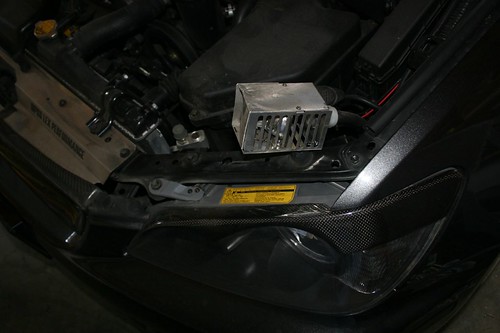
So like 3+ years ago, i upgraded from Umnitza’s generation IV DDE’s to the generation V ones. Those DDE’s were a plastic ring, with clear plastic fibers attached to a light box. Inside the light box was a bright and very hot lightbulb, which took up a lot of space. They were also a little faded white color, which i then colored with a sharpie to make them more yellow. (See this my.is post: http://my.is/forums/f90/finally-done-my-mean-ddes-202176/) Here’s a shot of how big the old light box is:
I hadn’t done much to the car lately, so i decided that i would upgrade the DDE’s to the new “CCFL” style bulbs. they are a lot smaller, and are powered by a little inverter box instead of the big light box, which would clear up the engine bay a lot. After talking to LCA575 @my.is (aka Justin@AAC) a bunch over PM’s, i convinced him to make me some yellow halos:
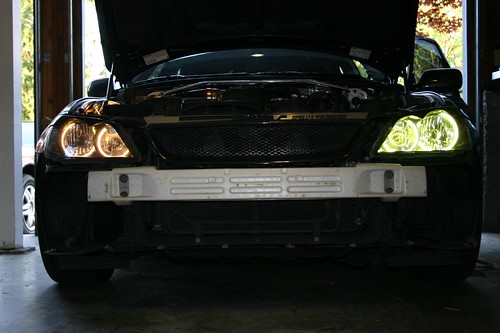
Installing the new DDE’s involved taking off the front bumper again, taking out the headlights, and taking them apart. I’ve done it before, so getting everything apart wasn’t a big deal. Although with the bigger wheels on, i had to jack the front up a couple inches so that i had enough room to get my hand and the ratchet inside the wheel well to undo the bolts on the back of the headlights.
Taking the headlights apart was no big deal, because i’ve done that before. the install was a little more tricky with these halo’s, though.
Here’s the content of the kit:
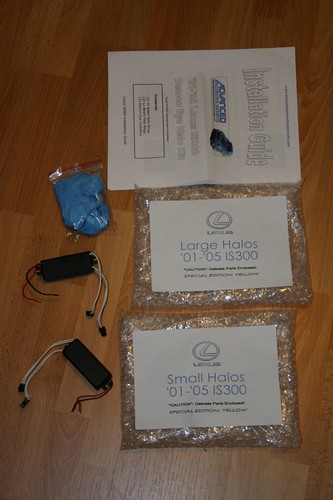
2 inverters, 2 small rings, 2 large rings, misc connectors, and some rubber gloves. nice 🙂
if you’ve read any of the install posts from anyone on my.is, you’d hear the nightmare stories about how fragile the halos are, that if you even look at them funny they will break. I’d read them, so i was being very gentle with them. And yet:
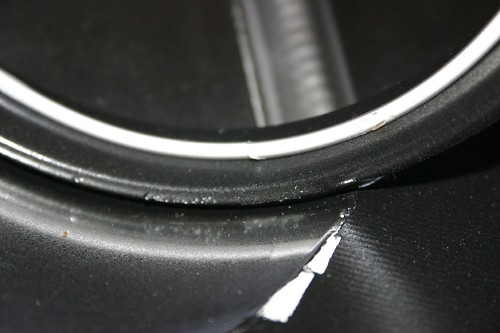
doh! in this pic, i had one taped into a backup headlight housing to do a test fit. I wasn’t even touching it at the time that it broke. I had set he housing down, and was picking up the other halo in order to test fit it when i heard a tiny little “clink” noise. i thought i had broken the one in my hand, but it was fine. the one taped into the housing had cracked! derp. That put a damper on the rest of the install. I wasn’t sure if i should keep going, as at this point, i’d taken a headlight out and had started taking it apart, but hadn’t gotten too far. I decided to do one headlight, that way if i broke anything else, i could buy replacement ones from LCA in a batch. I finished the other headlight without incident, with one small issue: the wires on the small halos were just barely long enough to get out of the headlight housing… so i cut the wires off of the broken halo and spliced them into the good ring. This made them just about the right length, maybe a little longer than i needed. I installed the updated headlight, and put everything back together on the car. I needed to drive while i waited for the new halo to get shipped, so i would have to take the bumper off again the next weekend.
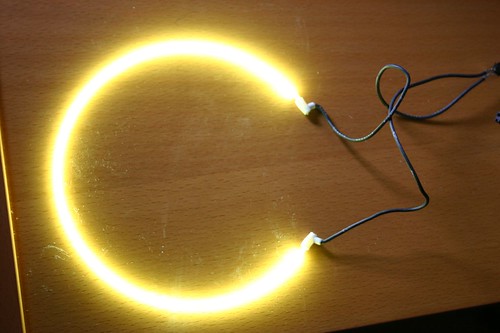
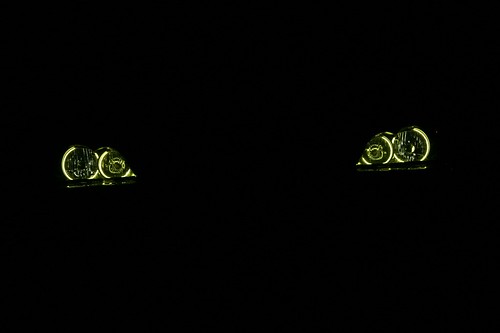
The nice thing about this situation was that it left me with one old and one new halo at the same time, so here’s a comparison shot:
the new halo is a little greener, but is a ton brighter. the old halos are just barely visible in daylight, and are invisible in bright sunlight. the new halos are completely visible in the sunshine, and are almost bright enough to drive on at night with no other lights. 🙂
I pm’d LCA on my.is that sunday night, and he had shipped me a replacement halo that week, and i got it on friday, so i could do the other headlight that weekend. When i got the new ring, i decided to bust out my friend the yellow sharpie and see if that made the lights a little more yellow. I was already coloring the back of the rings black (a trick for preventing them from backlighting the whole headlight), so if i didn’t like it, i could color over the yellow with the black and i’d be fine. They were a little more yellow, and i loved the contrast that the ring had when it was in the GGP housing:

A lot of people like the ccfls because they are so small that they are nearly invisible when they are off unless you are close and looking for them. I really like they way they look with the yellow, so i decided to keep it, meaning i was going to have to take out the headlight i’d already done, and color those too… 😀
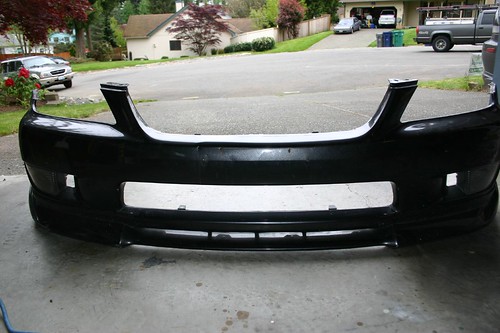
While i had the bumper off i decide to cut out the plastic grill at the bottom so i could match it to the metal diamond mesh in the carbon fiber grill:
For no obvious reason to myself, i apparently didn’t take any pictures of the mesh that i put in. I swear i did, and i most of the pictures i’ve taken since then, you can’t really see it very well anyway. But instead of gluing in the new mesh, i epoxied in some binder clips, and the mesh clips into those, so if i need to take it out or replace it its pretty easy. I also relocated the horns so that you can’t see them behind the grill.
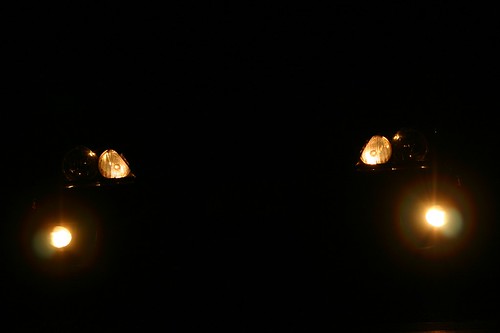
So here’s some night shots of the new halos:
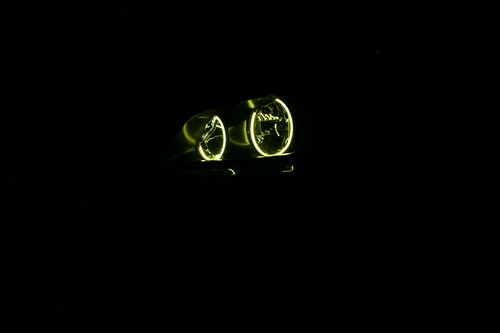
i have a whole bunch of combinations of fogs/brights/etc, and i’m going to do an animated gif of them, i’m just too lazy tonight 🙂 All the pics are at flickr if someone else wants to do it. I took them all with a tripod, so they should match up pretty well. I do notice now that the tripod was a little low, so the rings don’t look continuous, they look like they have a break in them at the bottom.
While i was taking things apart, i also replaced the standard high beam bulbs with some 3000k ones that match the fogs a little better:
I haven’t done the full power DRL mod yet, but its on my list!
Here’s a daytime shot of the halos off, so you can see what they look like:

So after i was all done, i was cleaning up wiring and mounting the inverters, doing general cleanup stuff, when i noticed that one of the sets of halos weren’t on….i thought maybe i’d forgotten to plug an inverter or something, so i investigated. and another “doh” moment… after cleaning up, i’d inadvertently wired one of the inverters backwards! so i had to PM Justin again and get another light box. Justin@AAC has been nothing but helpful through this whole thing. He could have easily screwed me on the cost of an individual ring or lightbox, but that isn’t his style. If more places had the service that AAC has through this, the world would be much better off.
As always, the pics are up at flickr in this group: http://www.flickr.com/photos/gardnerjr/sets/72157600151569707/, and there are a lot more pics here than in this post, and if you want to see really close up stuff you can see the full size versions there.

fyi, comments are moderated, so if you don’t see yours show up, just wait until i moderate it. 90% of the comments posted are spam. yay! v1agra!