I don’t know what it is, but every time Laura and Easton leave for a week, I end up doing some project that consumes all of my free time, and half of my sleep! I finally have some time to sleep in and relax, but no; I do a woodworking or home improvement project instead. Last May it was redoing the stairs. This year it was a cabinet for the theater room for dvds, games, books and things. We couldn’t use a floor standing one, as that corner of the room has an electric fan forced heater that requires clearance space. So the cabinet had to be a wall mounted one. Sounds like a project!
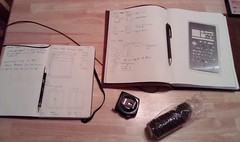
Friday night planning session. just me, some notebooks, a tape measure, and a roll of thin mints. the little notebook is my construction projects one, the big notebook is one I do other stuff in. The metal template is for drawing phone software user interface elements, but I was mostly just using it as a ruler and straight edge. I originally designed it without a center divider and having fixed shelves, so I’m glad I slept on it before starting it. I think this way turned out a lot simpler.
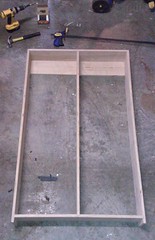
The carcass, and the face frame on top. The carcass is 3/4” birch ply, the face frame is whatever oak home depot had. the back cleat is cut at the center at 45 degrees to make it a “french cleat”. You screw one half of the cleat onto the wall, and then other half of the cleat gets attached to the cabinet. that makes it super easy to install and remove.
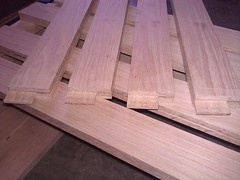
tongues and grooves! grooves and tongues! this always takes forever to set up, but once everything is ready, things go pretty quick. Getting the dado at the exact right height to make those tongues exactly centered and the right size took forever.
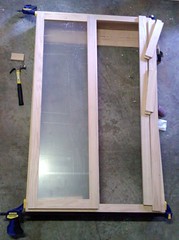
done! the windows are plexi, with the back sanded to make them semi-opaque. The inside of the cabinet is stained, the outside painted “sweatshirt gray”, the same color as the walls of the theater room. We decided on the gray color, as it would hopefully make the shelf blend in and seem smaller than it is, instead of black (to match the other furniture) or white (to match the trim.) Painting is always my least favorite part of these escapades. I’d much rather be doing the rest of the project than any of the painting. I used to dislike staining things, but now that is sooooo much simpler to me than painting. And I think that most of the stains smell better than latex paint, too.
You can’t see it, but the sides and center have shelf pin holes for adjustable shelves. I had to buy a jig to do that, so the jig and the self centering big that went with that were the one new tool I ended up buying for this project. I kindof wish I would have gotten the shelf pins that have the fancy sleeves, as the holes aren’t super clean in the plywood. Next time 🙂
here it is, installed. I still have to make some shelves to go into it, but that’s just a bunch of straight cuts, and maybe some biscuits. If I’m feeling fancy, I might use the router to route little slots for the shelf pins to fit into so the shelves can’t slide out.
I might also have to find some super rough sandpaper and scuff up the windows a little more, as from the picture above you can still mostly see into them. With the overhead lights off (they’re on for the picture), you can see a lot more than normal, but it’s still a little too clear.
I also have to find some hardware for the doors. I was originally looking for knobs the same size/shape as our entertainment center, but since this cabinet is a different color, it doesn’t need to match exactly. With the really tall doors, it might need some thinner, taller pulls instead of knobs too. we’ll see what I can find around… With the area in the corner, I’m thinking about putting some hooks/hangers on the left side, to hang xbox/ps3 controllers or something in that hidden space between the cabinet and the wall.


Leave a Reply