Like I said last time I built something, every time Laura and Easton (and now Barrett) go somewhere for a week,
I end up doing some project that consumes all of my free time, and half of my sleep! I finally have some time to sleep in and relax, but no; I do a woodworking or home improvement project instead.
This spring, same thing, for the third year in a row. The project this time was a “garage” for all of the toy cars we have.
This is the problem: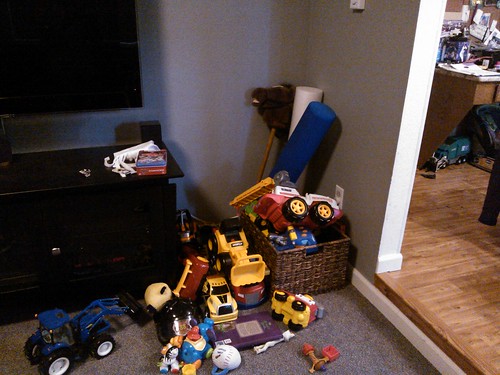
There’s a pile of cars that gets stacked in this corner every night. If you look close, you can see that there’s even another garbage truck over there on the right side of the pic up under the desk in the kitchen. Cars everywhere.
So laura wanted me to build a garage/shelf to put in that corner to neatly organize all of that…”stuff”. So I did. And like always, it took way more time than I expected.
Before they left, laura and I measured out the cars and did a rough sketch of what cars could go where to figure out the general idea of what we wanted. Originally, that meant a shelf that was 4 rows tall, and in the original drawing, that didn’t look too bad. but once I started doing the math, our sketch was nowhere near accurate for height. A 4 row shelf with the heights we needed would have been 48+ inches tall and been HUGE. and once you cross 48” then things start getting complicated and expensive as well, as you can no longer cut that piece from the “short” dimension of a standard sheet of plywood…
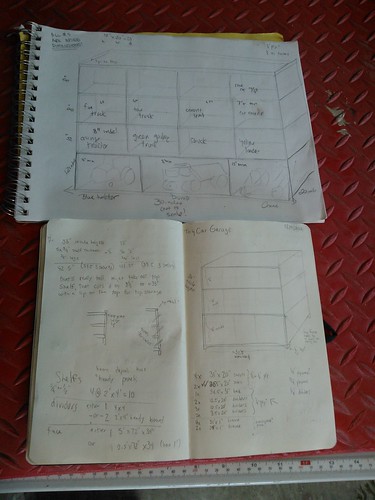
So I “edited” the shelf down to just 3 rows, making it ~39” tall, ~32” wide, and ~20” deep. That lets it fit in that space without moving the tv stand, and would make it just about the same depth as the tv stand, so it won’t stick out funny.
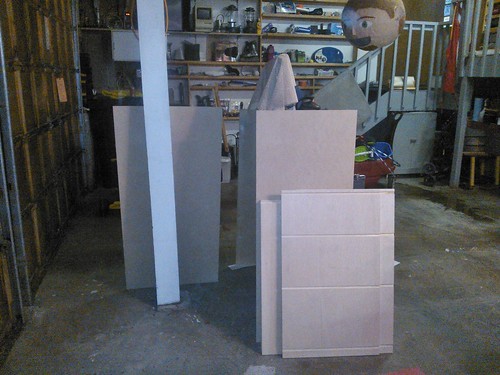
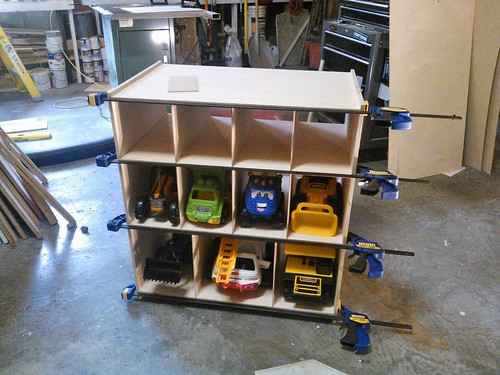
Build wise, I was going the simplest route. 1/2” plywood (12mm, technically?) for the carcass, with a face frame built from some wood left over from the theater cabinet. The dividers and the back are 1/8 fiber board, which just happened to be the cheapest nice looking stuff I could find at home depot. I cut dados in the sides for the shelves, then in the tops and bottoms of each row for the dividers. I left a lip above the top shelf so that cars could go up on top too, and not roll off.
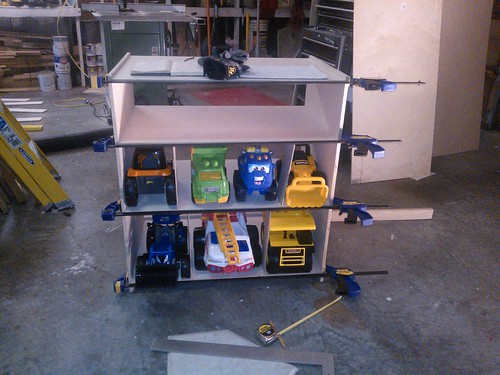
Test fitting some trucks and tractors to do the final decisions on the widths of each parking spot. In the original drawing, the first and second rows were the same widths, but the bottom two rows would be specific widths for specific trucks. When doing the final planning I rearranged and re-measured in order to simplify and make everything as symmetric as possible, and got it so that the bottom row was the only one that needed a specific setup, as that crane is super frigging wide. But each row is a different height, 12” for the bottom, 10” for the middle, and 8” for the top.
Cutting the grooves for the dividers was the most stressful setup, since I had to cut slots in the top of one piece, the tops and bottom of a couple, and just the bottom of one. and they all needed to be in the exact right places so that the dividers would be perfectly vertical. This is one of the reasons I was glad to get the top 2 shelves to be symmetric widths, that made a lot of the setup much simpler, making the bottom shelf the only special case. And even the bottom shelf had symmetric outer spots, so that wasn’t any more complicated.
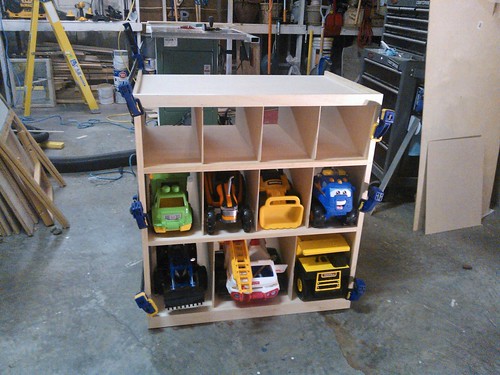
Here’s a shot with the face frame on. The face frame also has lip on the top edge, so that the cars and trucks can’t (easily) roll out.
The only “derp” mistake I made during this project was doing the face frame. I planned on using pocket screws to do the face frame, set everything up, and drilled the first pocket… and realized that it would be visible on the top edge, since there’s a lip on the top edge. I figured I could just fill that and you might not notice it after it was painted, but it still made me stop for a while and figure out if there was another way to do it.
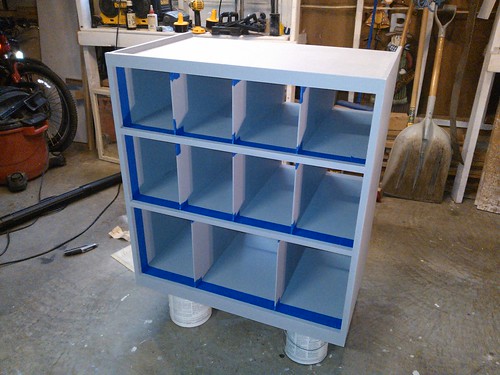
Here it is, all primed and ready for paint. Painting this thing was a giant pain; there’s just sooooooo much surface area to cover! and much of it is inside, where it was uncomfortable to get to with a brush. If I were to do it over, I might have left it apart, and used a spray on primer instead, then assembled the whole thing and done touchups. I’ve never been very consistent with spray paint, though. During the process of priming it, I realized that there was no way I was going to also paint the whole thing. I just didn’t have the patience. Or pain tolerance. So to match the tv stand and other furniture in the room, I decided to do the outside and the face with the same black paint Laura used on the end tables.
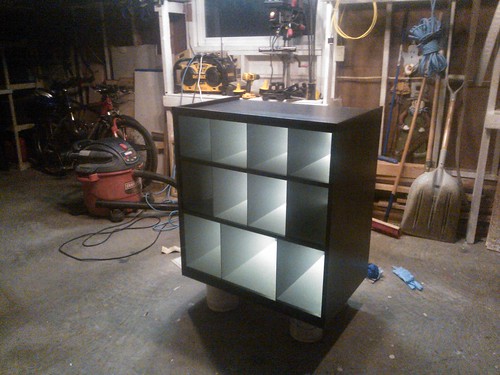
Mood lighting! To kick the fun factor up a notch, I decided to do some lighting too, and home depot had this really slick cree LED light rope that you could cut to your specific dimensions, and was dimmable. As you can see in the pic, it works great. Except the middle row. For some reason, after doing all the measuring and cutting, somehow, the outside 2 LEDs on each side of that strip don’t work. It isn’t quite as bad as it looks in that pic, and I cut a triangular section out of the back of the dividers there so that more light gets into those sections. once they’re full of trucks, it isn’t that noticeable anyway 🙂
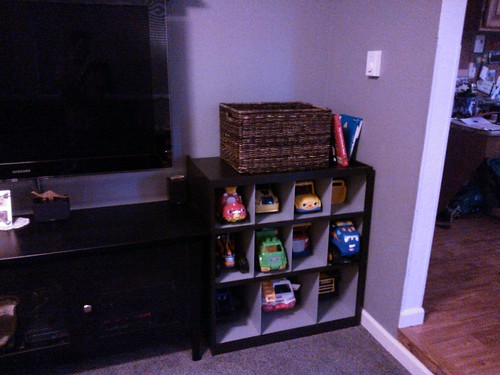
The after pic! It looks like the inside is the same color as the wall, but that’s just coincidence. The primer and the wall are very similar grey colors, but not the same. Scroll back up to the top and compare+contrast. all of the stuff in that pile is here, aside from the hobby horse + foam rollers that were in the corner. Easy has decided to donate the green garbage truck in the shelf, so that the other garbage truck in the kitchen can fit in with all his friends.
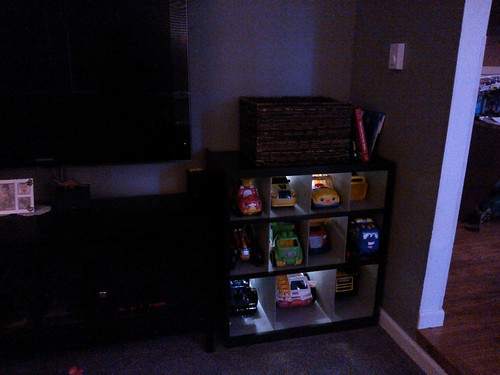
With the backlight on. In this pic, the light is cranked up to full, but in practice we have it set to nearly the lowest setting, which gives just enough light to be noticeable, but not enough to be distracting. The controls for the light are up on the top, in the back corner. I wish it had a little bit longer cord, but this way it is out of the way and isn’t an attractive nuisance for little boy hands 🙂
The shelf is already coming in handy, as the height and layout makes it very easy for Easy to put his toys away himself. So the last few nights when he wants to play something else, I tell him he has to put all his trucks away first, and he starts stuffing things into spots.

Leave a Reply