Random Review: Dead Rising 3

Way back when the XBox 360 came out (2006!), I did a review of Dead Rising.  It was  a great game, one of my favorites of that first generation of 360 games.  When Dead Rising 2 came out in 2010, it was lost in a sea of other games, so I never ended up playing it.  I did play through part of their free “preview” game, Dead Rising: Case Zero, but I never finished that either…

Dead_Rising_3_Cover_Art

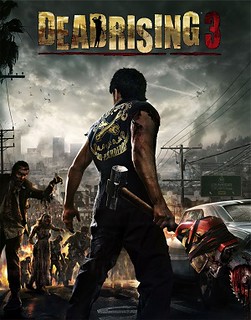
When the Xbox One released a few months ago, Dead Rising 3 was one of the launch titles.  I didn’t buy an Xbox One right away, instead I waited for the holiday drama to subside, and watched for people selling consoles they might have bought only to flip to people that were desperate for one during the holidays.  And indeed, I did get a great deal on a bundle with an extra controller, Dead Rising 3, and Lego Marvel.

My review of the 3rd installment would be very similar to the first one.  It was awesome.  Hilariously awesome.  Execution wise, very similar to the first game.  You have a limited amount of time to follow through the story, rescue people, and wreak mayhem amongst the hordes of zombies.  and on the xbox one, they are literal hordes.  It was amazing to be standing on the roof of a car, and its just zombies, everywhere, as far as the eye can see.  Thousands of them.

Dead Rising 2 apparently introduced the “combo weapon” concept, where you can take 2 random things, like a rake and a car battery, and turn them into an electrified rake.  Or a giant stuffed bear, a machine gun, and a radio (or whatever) to make this automated bear machine gun that sits on the ground and taunts zombies, then kills them.  And many of the combo weapons can then be combined with something else to turn them into “super-combo” weapons that can do amazing amounts of damage or maybe small amounts in a very hilarious way.  One of favorites was “the ultimate shout”, a combination of an orange traffic cone, a speaker, a battery, and a portable radio.  To use it, you’d hold it up and yell through it, causing all zombies, vehicles, and items in like a 30 yard cone in front of you to be destroyed and sent flying.  Another was the “Electro ice staff”, which was a traffic light combined with a battery and then liquid nitrogen.  you could swing it like a staff, or ram it into the ground, freezing everything around you, or aim it like a gun and fire it to freeze zombies in front of you. 

And this electro ice staff leads me to one of my favorite features in the game (well, in the XBox One in general), called “Xbox record that”.  While playing any game, you can just say out loud “xbox record that” and it will save the previous 30 seconds of whatever just happened.  Then later you can edit it and share it.  Here’s an example,of me using said “electro ice staff”, racking up a HUGE combo of 525 kills:


As you can see in the video, my character looks a little.. out of the ordinary?  Prior to this, there’s a section of the game where you have to infiltrate an area filled with special forces soldiers.  You have several options for getting into the area, like attacking, guns blazing at the front door, sneaking in through a high window, or blending in by finding a uniform. Like the other dead rising games, there are clothing options scattered throughout so you can change clothes and look like whoever you want.  prior to this point in the game, I was always wearing a “Mr. Rodgers” style red sweater, which I thought looked rather stylish :).  It turns out, if you’re wearing the uniform, special forces soldiers won’t shoot at you until provoked… So I took advantage of this for the rest of the game.  I picked up other clothing to try to get achievements, but I always went back to the SF outfit.  And my crazy outrageous head is a Blanka (of street fighter fame!) mask.  It turns out the mask can be combined with other things to make a mask weapon as well, but I wore it because it looks hilarious.  Even more hilarious than running around killing zombies with a blanka mask on?  Cutscenes with a blanka mask on!  


None of the other people in the game seemed to notice that I was wearing a hilariously outlandish mask. I swear there was a kissing scene that I recorded, but I can’t seem to find it on the game dvr.  If I find it, I’ll add it here.

The only thing that I ran into that I didn’t like was that you never know if a main story mission is going to jump you way ahead in time.  When I was near the end, with less than 24 hours (of the initial week) left, I completed what I thought would just be the end of that chapter.  Yes, it completed the chapter, but also skipped all the way to the end of the 24 hour period, right to the last phase of the game, putting me in a timed section where I couldn’t do any of the rest of the side stories that I had in progress!  and not only that, the last part had checkpoints, so when I got about 3/4 of the way through it, I realized that mistakes I’d made at the beginning of the section were going to make it impossible for me to finish what I needed to do before the bad guy finished what he needed to do.  So I restarted that chapter.  Which apparently aborts any and all side missions that were in progress?  Once I completed the game, it lets you start over but keep everything you’ve found, your level, etc.  So I tried to restart the chapter I’d been on before I’d accidentally finished so I could complete all the side missions… only none of the side missions I’d completed to that point were done.  you can redo that chapter, and start any missions that you can find in that chapter, but none of the survivors you’ve rescued are available, etc.  If you want to do any side missions you missed, you pretty much have to start over again from scratch.  Bummer.  Like in the Lego games, I wish there was a prompt before you did something that was going to make it impossible to go back. Or if not a prompt, some other kind of indication that you can’t go back…

All in all, dead rising 3 was a great game.  The story was good, the forced timeline forces you to make some decisions about who you’re going to try to save, and how much extra stuff you’ll try to accomplish.  The characters are believable to a point, and then they throw all believability aside because, well, it’s a video game about zombies that started with mutant cows to produce cheap hamburgers.  While violent, a lot of the violence is hilariously cartoony, like driving a steamroller combined with a motorcycle that shoots flames.  So fun!

At one point, Dead Rising 2 was free in the Games for Gold program, so I did download it (I think!), now I’ll just have to find time to go back and play it, so I can fill in the parts of this story that didn’t make sense!

Posted in General Tagged with: ,

Random Review: Surface Pro 2

I’ve had a Surface since they originally came out.  I bought a day one Surface RT of my own, and used it all the time.  I really liked the idea of the surface pro, but since it had like half the battery life of the RT, at like twice the expense.  But when the surface pro 2 was announced, it was with a much more efficient Intel i5 “Haswell” processor with much better battery life.  And much more available memory. And a much bigger drive.  So I pre-ordered the Surface Pro 2 with 8g of ram and the 256g drive.  After using it for several months now, as a tablet, a laptop (and now as my entire desktop replacement!), here’s my bullet item pros and cons random review.

Pros:

  • can run everything windows!
    • Being full windows, not windows RT, I can run pretty much every app I’ve ever needed ever.  Although, aside from doing development or playing games, I’m finding that there are windows store apps for almost everything I need.
  • this means Steam games are “game on!”
    • Shadowrun Returns plays great with pen and touch input.
    • I’ve also played Star Wars: The Old Republic on it as well, although I do have to set scaling to 100% or the UI gets confused and clicking doesn’t go where you think it does!
  • visual studio!  I can use this as a dev box!
    • In fact, I have to, since my old desktop machine doesn’t have hardware capable of running the windows phone emulator.  But the surface pro does, so I can work on phone apps and windows apps.
  • skydrive OneDrive integration is awesome
    • except that it now requires sign in with a microsoft account, you can’t even open the app at all on a domain joined machine at work (which is probably safer, since you can’t accidentally save stuff there when you should be saving to Skydrive Pro OneDrive for Business at work anyway…
  • Windows Live Writer!  I still don’t understand why there’s no version of live writer for Win8 yet.  that would be even better
    • plus, you can set the drafts directory to OneDrive, and POOF you have those synchronized across machines too
      • to do this, using regedit, go to HKEY_CURRENT_USER\Software\Microsoft\Windows Live\Writer, and add a new string value “PostsDirectory”, and point it to whatever directory under your C:\Users\[user]\SkyDrive\Documents folder that you want to be your live writer “cache”.  (since the name change, I haven’t checked to see if they’ve also re-named the directory or not!)
      • then, in that directory, right click the folder and set its Skydrive settings to “Available offline”.  without this step, writer didn’t seem to see the posts synced from the other machine.
    • You can also use 2 finger zooming to zoom in on the text part of live writer, even though there doesn’t appear to be any mention of zooming anywhere.  I’ve read some things online that said ctrl-+ or alt-+ used to zoom, but that only worked for zoom out for me, and I found 2 finger zoom gesture by accident. But it does work awesome!
  • Pen input is pretty cool.  I wish i could draw better!
    • I use it  all the time to take notes in meetings, and then using the ink to text features of onenote, it is (mostly) turned into searchable notes.  about the only thing that I have had problems with for that is if I underline or cross out things, that ink stays behind but doesn’t match up with the text anymore.  that can be confusing.
    • The pen also works very well in Shadowrun Returns. 
  • Surface Pro dock + USB3, ethernet!
    • I Have the SP2 hooked up to a 10 port USB3 hub when I’m at home.  Attached to this hub is a USB3 blu-ray drive, a USB3 hard drive enclosure with a bunch of drives in it, and various other random things, like the fitbit dock thing.  Also, standard keyboard and mouse.  
    • Also, hooked up through minDV to a big monitor, so when I work from home, the SP2’s touch screen is always showing outlook and lync (or skype), and the bit monitor is remote desktop’d into one of my machines running VS

Cons

  • gets a little hot when running games
  • noticeably heavier than a Surface
  • the new type keyboard doesn’t have physical buttons on the cover’s trackpad, so I didn’t get one.  I’m still using the type cover 1 on my Surface Pro 2, and the touch cover 1 on our Surface RT. 
  • the multi monitor scaling support on windows 8.1
    • It doesn’t make any sense to me!  Supposedly, by unchecking the “Let me choose one scaling level for all my displays”, it does some kind of different scaling per monitor.  But there’s no independent settings for each monitor?  When in this mode, I want the SP2’s screen scaled up to the 150% (default) setting, so I can use touch more effectively.  But I want the external monitor completely unscaled.  This doesn’t appear to be possible.  No matter what I choose, things on the secondary monitor are sometimes scaled, sometimes blurry.  Office does one thing, Windows does its own thing.  The taskbar gets scaled up, like it it is on the main monitor.  I don’t understand why there isn’t an explicit scaling setting on each monitor on the “Screen Resolution” control panel.  It seems that windows is trying to guess what I want, instead of letting me tell it explicitly what I want. 
Posted in Uncategorized

What I work on: CodeLens (VS2013 RC!)

As of yesterday, the Release Candidate of Visual Studio 2013 is now available! (And, MSFT changed its mind, so if you have an MSDN subscription, you can also download Windows 8.1 RTM!)

The feature my team (and others) has been working on, CodeLens, has undergone some major updates and cleanups since the preview. To see the most of it, you can go to

Here’s just one little picture including some of the new stuff. for the rest, go to the MSDN link above!

codelens tasks

In the RC, we’ve added indicators for bugs, workitems, and code reviews that were attached to changesets for that code. Keep in mind, this is changesets associated with that class/method/property, not changesets associated with the file! This makes it super easy to browse through the code and see exactly who (authors indicator, showing the last person to change the code (above, Jamal Hartnett and 2 others), what (4 changes affected that constructor), why (for 2 bugs and 1 workitems), and who reviewed those changes (1 code review). You can also see that that constructor has 12 references from other code, and that in the current state, only 6 of 11 unit tests are passing.

In the authors and changes indicator, there’s also a “local version” tag that appears for the version of the code you have locally. If you’re working on some code, and you see that the changes indicator says “5 +1 changes”, you know that someone else has moedified and checked in a change to that code, so you better get the latest version, or, to quote South Park, “you’re gonna have a bad time!”

We also hooked up Lync integration, so if your org is using Lync, when you open the details popup, you can see the Lync status of the people who’ve touched the code (looks like Jamal is green, so he’s available!), and you get the full lync integration, with a link contact card, and the ability to IM or start a call/video chat right from inside the IDE!

We also added expanders, so in all of the TFS powered indicators you can see what workitems are related to what changesets by clicking the standard VS triangle expander. There’s also a new icon up in the upper left corner that lets you dock the popup into a full toolwindow, so you can move it around, make it bigger, and keep it open while you click through references or tests and navigate around in your code. Each different indicator can dock to its own toolwindow.

The references, test status, and tested by indicators also got makeovers and new features, so make sure to check those out as well. Those indicators are not powered by TFS, so they’ll work even if your org isn’t using TFS!

Posted in General Tagged with:

Another new office!

This one is much bigger than the last.  Unfortunately, it isn’t a single office.  it would be pretty awesome if it was.  But my team (and most of the rest of the team that makes Visual Studio) is now in “Team Rooms” in the newly remodeled Building 18.  Team rooms are the new hotness, apparently.  I think that every team in b18 (including managers, etc!) are all in team rooms.

Old office in building 41, in photosynth panorama form:

photo (10)


New office in building 18, also in photosynth panorama form:

photo (7)


The team room looks really big, but that’s partially because there’s no computers in that picture.  Once everyone has their 2+ monitors and 2 computers slung under the desk, the room fills up quickly.  I’m still looking for a bamboo plant or something to put in the “hole” between the 4 desks where I am.  We’ve been in the team room for about a month now, and so far, it isn’t so bad.  The layout of the building itself makes for a lot of people wandering into the teamroom looking for a conference room, or the copy room, but other than that things are good.  Well, except the time I got trapped in the elevator.  But that was only for a couple minutes 😀

Posted in Uncategorized Tagged with:

What I work on: CodeLens!

Today at the //build/ conference, Visual Studio 2013 was announced and shown in preview form (and download!). And once again, my group (well, my group plus our larger team) made the front page of visualstudio.com:

2013 indicators!

In Visual Studio 2013, when doing c# and vb, you’ll get extra “indicators” above your methods that give you kindof a “heads up display” of things about that class/method/property. The first one shows you references to the method, if you’re also using TFS it will show you which people have touched that method and in what changesets. Its tfs history on steroids! If you’re also using the built in unit testing features, that method will also show you an indicator that shows which tests test that method, and how many are pass/fail. If you click on any of the indicators, you’ll get a popup that shows you the details, and each details popup window has more useful info and actions you can do with that reference, or that changeset, or that unit test!

2013 popup

From the article at visualstudio.com:

Understanding what a line of code does is only part of your challenge as a developer. You must also understand its history, who worked on it, what code references it, and more. This becomes especially challenging in team-oriented projects. CodeLens (Code Information Indicators) in Visual Studio 2013 Preview uses information from both your project metadata and Team Foundation Server 2013 preview to place decorators on each of the methods in your code that show information such as what changesets led to the creation or recent change, who was the last person to work on the code, what unit tests cover the method (including the latest pass/fail state), and what code references exist. You can also quickly jump into that data, such as an associated changeset or referenced code file with just a click.

The larger ALM org (along with Matt and others from the VS language experience team!) was responsible for the plumbing that makes it work, my group was specifically responsible for the authors and changes indicators, and I did a lot of work to make that popup with the callout that points back to the originating indicator, among other things.

Edit 6/27/2013: There are even live msdn docs for codelens now!

Posted in General Tagged with:

Now on Azure!

So as an MSDN subscriber, you get up to $150 / month of credits on windows azure. And azure supports wordpress, so… I created a site on azure in like 5 minutes, exported the content from my garage based server, imported into my new azure site, and blammo, it’s back up. Admittedly, it took some time to re-install all my plug-ins and find a new theme (the theme I was using hasn’t been updated in 2 years, apparently?), but other than that it was a pretty painless process. Then I tweaked some DNS things (which required overnight to propogate), and everything appears to be working. So far! I’ve been looking for a way to move all of my hosted stuff off of the server that’s running in my garage, and the combination of this, azure’s VM service, and the MSDN credits might finally be a solution!

Posted in General Tagged with:

What I Work on: Code Map Debugger Integration

In the last “what I work on” post, I talked about the Code Map feature that was new in Visual Studio 2012 Ultimate (Update 1).  It has turned out to be a very popular feature (as it should) because it is super useful!

After people have used Code Map for a while, one of their first requests is “how do I get debugger information into this map?”  There are ways to do it, where as you step through code, you keep manually doing “show on code map” on the method you’re in, but that gets very tedious.

So, for Update 2 (now available!) we added debugger integration to Code Map!  To see it in action, you can watch this channel 9 video, or update today and play with it yourself!

Here’s a screenshot of it in action, debugging a Windows 8 Store C# app:

code map debugger integration

When debugging the “old” way, you have to watch both the editor window and the call stack window, step in or out or whatever, and try to mentally figure out what is still on the stack, which commonly ends up in “where am I now?”  or “how in the world did I get here?” kinds of issues.  And then, as soon as you stop debugging, the call stack window goes away, and if you were stepping through code that you don’t have open (so it was open in VS’s preview tab), then most of the files you stepped through aren’t open in the editor anymore! I know that I end up copying the call stack, and pasting it into notepad so I can remember where I was.  Or, if I’m trying to correlate multiple call stacks, I paste them into columns in an excel spreadsheet, then do a lot of excel work to line things up  to figure out what is the same.

Instead of all that… debugging the “new” way with the code map debugger integration gives you a nice little treasure map of where you’ve been (gray nodes), where you are (the standard call stack arrow, visible in the map, the editor, and the call stack window), and everything that is currently on the stack (orange nodes).  As you hit breakpoints or step around in code, the map updates to add whatever is on the stack at that point in time.  And when you stop debugging (and the stack window goes away!), the map is still there, and still functional!

You can see in the picture above, I was doing “shotgun” debugging, where I just scattered breakpoints around the code, to see who calls what.  In the old way, you’d have to mentally figure out that almost every call in the app ends up going through one method, with a giant name in the call stack window, like:

App1.exe!App1.Common.LayoutAwarePage.OnNavigatedTo(Windows.UI.Xaml.Navigation.NavigationEventArgs e) Line 332    C#

which certainly is a mouthful.  instead, in the graph, you can see it as a single node, you instantly see that everything we put breakpoints in goes through it somehow, and if you mouse over it:

codemaptooltip

From both the graph and the stack window, you can double click and go right to that code.  But, from the graph, you now have all the other powers of Code Map at your disposal.  Want to see what types all the methods are in?  Who derives from what?  just use the “show related items” menu in the code map toolbar, or right click and do stuff from there:

codemapwithcontaining

I did several steps to get to this diagram, by clicking the “LoadState” item in the first graph, and doing “find references”, which added 3 LoadState overloads from other classes.  Then, I selected everything and did “show containing type”, which added the groups.  Then I did “show derived types” on LayoutAwarePage, showing that 3 things on the graph are green, indicating they are the types that are subclasses of LayoutAwarePage. 

One of the fun things about the debugger integration is that almost every language that VS supports has really good debugger integration, because debugging is essential.  Not every language integration implements the things that Code Map needs to be super effective.  So if the debugger works for a language, the map part of the debugger should work.  Want to see how your old school C++ Win32 app works?  Put in some breakpoints, and generate a map,  and poof:

how your win32 app works

Want to see how your old school c++ Win32 app really works?  in the call stack window, right click and select “show external code”, then generate that graph again:

how your win32 app really works

In the first graph, all the items outside your solution end up being elided, and just show up as dashed links with “External Code” labels.  With “show externals” turned on, code map creates an individual node for everything that shows up in the call stack window, with a faded out look.  If the external assemblies have debug information the debugger can see, they’ll have somewhat useful names, but if you don’t have debug info for those assemblies, you just get addresses, but you still see the relationships!  you can see that Win32 has a lot of loops!

Posted in General Tagged with:

I Love my Surface!

I’ve had a Surface (RT) since the Surface launch day, and I love it. (Note: I am a Microsoft employee, and recently they did give each employee a Surface for primarily business use, with personal use allowed, primarily for evangelism purposes. The launch day surface is my own personal surface, purchased with my own hard earned money). Since buying the Surface, I haven’t used my laptop! Here are just a few of the things that I love about it.

  • Multiple user support. On “our” iPad (our in quotes since Easton has pretty much monopolized use of that device for the last 2 years), every time I turn it on the icons are somewhere else. Or not even there. I don’t know that he knows he’s doing it, or even doing it on purpose, but he does from time to time unintentionally uninstall apps. In order to “protect” stuff I want, I have all of those things in a folder on a secondary page. From time to time those things are all re-arranged, but he pretty much knows not to touch daddy’s stuff in there.


    But the Surface is a windows machine, complete with true multi-user support! So Easy has his own user account on the surface. He just taps his face at the login screen, and he is in his own account that I can control. I unpinned all the stuff he doesn’t need, and installed apps and games for him to use. My account has a password, so he can’t get in and mess up my stuff. Similarly, Laura has her own account with all of her stuff. Switching users any time is a 2 tap affair.


    There’s another interesting thing with having true user support, though! You can also flip a switch on Easton’s user account to turn on “family safety” settings. This turns on monitoring and reporting features, so every week I get an email like:

    family safety


    You can even see in the picture that it keeps track of web searches! In the pic above, I was trying to figure out how to get the windows store apps I’d purchased on my account to show up in his account as well. It also shows me using Flickr to find a picture to use for his account. The rest of that time playing Netflix and pinball and paint is all him 🙂


  • Doing 2 things at the same time! Similar to the “Snap” feature of windows 7, in windows 8 when using store (aka Metro) apps, you can drag one app to the side, and it will take up about 1/3 of the view. This lets you do work and watch twitter scroll by, or watch a movie while playing a game, etc. That mode comes in super handy on airplanes:

    Screenshot (4)

    I played games and watched movies at the same time for a couple hours while Easton slept on one of our recent airplane rides. Worked great!


  • Size and shape. I think this thing is just about the perfect size and shape for me. Maybe the screen could be bigger and the bezel thinner, but not by much. The surface is almost the same size as a piece of paper, but a little narrower. With the keyboard flipped shut, holding it by the spine feels a lot like holding a book. I carry it like one every day. With the kickstand out, it is a good angle for me, and it works well on my lap that way when I sit on the couch. I’m typing this right now, with the surface on my lap, kickstand out, typing on the touch cover, and it works a lot better than I thought it would.


  • The touch cover! This thing is freaky. It doesn’t look like it should do anything. It looks fake. And yet it works! It does take some getting used to. I miss the spacebar more than anything, and because there isn’t a lot of texture on the keyboard, it is easy to get off home row and start typing gibberish. The F and J keys do have a different bump on them so that you can feel where they are, but I’d like it if it was a raised bump instead of a dimple. The touch cover also has a track pad and buttons, although some people I know didn’t realize that was there. You can also flip the touch cover under when using the kickstand, which makes it into a pyramid. That makes it stable on thing that where the kickstand alone wouldn’t work well.


  • USB. Having a USB port on this thing has been great. When I want to charge my phone AND the surface, I don’t need to take up 2 plugs. Plug the surface into the wall, plug the phone into the surface. Done! Want to play a game that would work better with a controller? Plug in a wired Xbox 360 controller, and it just works:

    using controller
     

  • Micro SD card. The surface also supports removable storage, so I added 64 gigs of space for movies and music and stuff by just sticking in a tiny little card. During xmas, this came in handy, as my dad wanted new pictures of us to put on a digital photo frame. I plugged the card into the home computer, copied a couple gigs of pics onto it, and brought it home in the surface. My dad has a camera that uses micro SD, so I just popped the card into his computer, copied all the pics there, then stuck in the card for the photo frame, and copied them there. Having a standard SD card slot would be nice, but would take up a lot more space than the micro one does. Having 64 gigs of space also means that I have a bunch of movies on here, so I had stuff to watch on airplane rides during the holidays.


  • Gestures. I’ve gotten so used to the swipe from the edges gestures on Win8 that I unintentionally do them on my phone. Swipe in from the left edge of the screen to see running apps and switch (if you have that turned on, otherwise that swipe is effectively like alt-tab), swipe in from the right to get to search+settings (aka the “charms”), swipe from the top all the way to the bottom to close an app. Although, that close app swipe has had me close IE lots of times when I really just meant to close that tab 🙂


  • Battery life. So far, battery life has been pretty excellent for what I do. Even playing games and surfing, this thing lasts a couple days on a charge. And it charges super-fast. Couple hours on the charger and it is full. Sometimes the power connector can be a pain to seat just right, but that’s fine. I don’t think I’ve ever gotten an iPad connector in the right direction the first time ever, either. The only oddity so far is the low battery warning. Sometimes you don’t get it, and it goes to low battery shutdown. I tweaked power settings to warn me at 10% instead of the standard 5% and it hasn’t been a big issue.


  • OneNote (+SkyDrive +SkyDrive pro). I use the Win8 store (aka “metro”, aka “mx”) version of OneNote all day at work. With SkyDrive, my notebooks are shared across all of my computers, my surface and my phone, so I have things like shopping lists, blog notes, and other stuff all there. For work, I have my work notebook up on my SkyDrive pro (aka “my SharePoint”?), and I religiously track what I’m working on. I’ve been using OneNote every day since starting at Microsoft. You ask me a day in the last 3 years, and I can tell you what I did that day, if it was a work day. And the surface makes a pretty good meeting notes machine; it is small, and typing on the touch cover is almost silent.

    todo

    Screenshot (8)
     

  • Apps. A quick rundown of the things I use all the time, other than OneNote:
    1. Nextgen Reader – for feed reading of my Google reader feeds.
    2. TweeterLight – for twittering. Or twitter stalking anyway, I don’t post that much.
    3. Taptiles – an addictive tile matching game. Like 3d mahjong, kindof. Hard to play well with the mouse, but fantastic when tapping away. Especially when “green gem” mode kicks in and you’re just madly tapping with all fingers of both hands.
    4. Netflix, of course.
Posted in General Tagged with:

What I Work On: Code Map

Yesterday, Visual Studio 2012 Update 1 shipped! So I can officially talk about what I just worked on. Much of it has already been available in preview form and CTP releases and such, but you don’t want to get in trouble! 🙂

I joined the Visual Studio team back in April, just as work was finishing up on Visual Studio 2012. As part of that release, the VS team was moving to much more agile release schedule for updates, so here we are, about 4 months after going gold with an update with lots of fixes and cool new features!

The group I work in is called “Developer Visualization”, and is part of the “Application Lifecycle Tools” team. Most of our team’s features are part of Visual Studio Ultimate, but our team is responsible for some of the code that powers the Solution Explorer in all versions of VS. Anyway, the big new thing we worked on for VS Update 1 is called “Code Map”. While looking for a picture of the feature to put up here, I went to the official update web page, and BAM! Code Map is the background image! (I think the technical term is the “hero” image)

VS Update 1
(in that screenshot, i’m directly responsible for the green nodes (results of a query) and the green arrow (the cursor location))

What is Code Map?

Visually graphing code is nothing new, people have been drawing code diagrams of various forms for, well, as long as people have been writing code. Visual Studio has had graphs for a long time as well. Before I joined VS, a lot of the graphing code was re-written for 2012, in order to make it more useful, usable, and scalable. In ultimate, the main entry point to creating graphs was what we call “top down”, via the Architecture menu on the toolbar. You can use it to create a dependency diagram of your entire solution. But it starts a the assembly level. You can see which assemblies reference eachother, and then you can expand the assembly and see the namespaces inside. You can expand the namespaces to see the classes inside, and all the relationships between them. (The technical term for this is “progressive reveal”, which was the old name of our group). Another way to generate these graphs is via the architecture explorer, but that’s a rather advanced tool that not everyone uses. But generating a graph this way means you have a lot of stuff you might not be interested in! You can move stuff, remove stuff, but in a large solution, that would take a lot of time!

In Update 1, the Code Map feature lets you generate diagrams in the other direction (what we call “bottom up”) piece by piece, directly from code, side by side with the code editor (for C# and VB). Have the cursor in the code on a method? Right click, “Show on Code Map”. Poof: the window splits, and a new diagram appears with the method you were on. Put the cursor somewhere else, and use the keyboard shortcut, Ctrl+` (control+backtick), and poof, that method appears on the graph as well; and if the methods call eachother, the graph will automatically have links between the items on the graph. You can add pretty much every code construct to the graph: classes, method, properties, enums, etc, etc, and the links magically appear. You can also add things to code maps by dragging and dropping from solution explorer, or by using Show On Code Map from there.

But Wait, there’s more!

Not only can you then create small diagrams, only containing the things that you want and the relationships between them (a great way to explore unfamiliar code!), but you can explore the code directly from the graph! So you added a method to the graph above. Who calls it? From the code editor, you’d right click and do “Find all references”, and results appear in another window. In the code map, right click, and look at that, “Find all references” is there too! Select it and it will find calling methods, and add those to the map, with links between them. Want to know what class those other methods are inside of? Right click, “show containing class”. Nodes will now be grouped by which classes they are in, and links will be displayed between classes. Want to see the base types of a type on the graph? Derived types? All available! Add some notes, save it, send it around!

Want to see it in action? Go watch this channel 9 video!
Want to use it? Fire up Visual Studio Ultimate (you deserve ultimate! Upgrade today!), install Update 1, and get your Code Map on!

Posted in General Tagged with:

Random Review: Lego Batman 2

bat-easyIt should almost be called “Lego Superman,” as he’s probably the best character in the game :).  Most of the Justice League makes appearances in the game, but they don’t have much importance in the story, which is a shame.  hopefully it’s a setup for a full fledged lego justice league game?  (related: why is there no lego:Avengers game?!!?)

Easton and I have played through several Lego games now, and of all of them, this was definitely the hardest.  In most of the other games, you have to learn how to move the characters.  In the first Lego Batman, you also had to drive some vehicles, but that’s it.  Lego Batman 2, you have to learn how to:

  1. move the characters in missions (no biggie, all the other games have done this)
  2. move your character in 3rd person over the shoulder view, where the right analog stick also moves the camera, as all of the between missions take place in a sandbox style world
  3. drive vehicles in 3rd person view, because the sandbox area is so big.
  4. fly vehicles / people in 3rd person sandbox mode, because that’s a little different controls than driving.
  5. fly vehicles in a flight sim on rails style in missions
    The large amount of control schemes made it hard for Easy to pick up.  In the sandbox area, a lot of the times he was really confused about what he was supposed to be doing, and how to do it. 
    The other interesting thing was how the in-mission split screen worked.  The first time the “auto” split screen took over, we didn’t even notice right away, and we realized we were on opposite sides of the screen from where we were sitting on the couch, so we switched spots.  and like 2 minutes later, I realized that somehow we were again on the opposite side of the screen from where we were sitting.  The splitscreen is actually genius!  If you’re close together, there is no splitscreen.  as you get farther apart, the screen divides, but not exactly horizontally or vertically.  Depending on where you are and where you are going, the splitscreen might be diagonal, and as you move around, the split line moves with you.  As long as you’re watching your own character, you never really notice it.  I imagine that a 3rd person watching might get really confused and a little dizzy, though.
    That being said, I think it is the best lego game so far.  The voice acting gives the game a lot more sense of character, and allowed them to tell a new real story, instead of how most of the Lego games are a caricature or some existing content.  It also let Easton follow in the story without me having to explain what was going on, or read all the captions to him.
    The one thing we really missed from the original Lego Batman was being able to play the missions from the bad guy point of view.  that was one of the most clever things in the original!

Because of that, the story part of the game seemed pretty short.  when we finished it and the credits started rolling, both Easton and Laura said “that’s it!?”.  Then I explained that we had 250 gold bricks to find, 20 red bricks to find, 50 people to rescue, a ton of guys and vehicles to buy, etc.  Even 2 weeks after finishing the story, we’re only 76% complete, and still have yet to go through all of the missions again in story mode!

My biggest complaint is mostly about switching characters.  In sandbox and story mode, you can hold Y to switch characters.  While the character selector is up, the other player can’t do anything.  Easton love to switch guys, so I spend a lot of time just waiting for him to pick someone.  And if you were robin or batman in a special suit, switching characters makes that go away, and you revert to normal batman or robin, which is really annoying.  You might have to run all the way back to the beginning to switch back to a specialized batman and run all the way back…

My only other major complaint was the autosave stuff in sandbox mode.  If you find something that causes it to save, both of your characters freeze and can’t move for ~5 seconds.  But nothing else freezes, so if there is money to pick up, it might disappear during the save.  If there were bad guys attacking you, they keep hitting.  if you were driving a vehicle, you just go straight for a while.  That could have been handled a little better.

There were lots of other minor gripes, a fair number of freezes or crashes, some glitches where we got stuck in walls or floors, etc, but that’s all par for the course, and they were rare enough to not be a big deal.

One thing that I did like, however, was that (finally!) a lego game doesn’t make you press all kinds of buttons to load a game.  It used to be that you’d press start, press down once to select “load”, press A, the save location prompt appears, select your location, press A, choose your save, press A, loading starts, it says it was successful, Press A, it warns about autosave press A (start,down,a,a,a,a,a).  This version auto finds saves, so you don’t get prompted for locations if there’s only one, and you can just press start, then A A A and you’re in.

TL;DR: best lego game ever!

Posted in General Tagged with: ,

XBox GamerCard

Recent Flickr

www.flickr.com

Archives